Hey there! Dreaming of running your own custom business without spending a lot of money? You can do it right from home. Many people start small with custom t-shirts, mugs, phone cases, or gifts and grow from there. The key is to keep costs low while offering products customers want. In this guide, I’ll show you step by step how to begin with very little money. Everything is explained in simple words so you can follow along easily.
Why Starting a Custom Business from Home Makes Sense
Running a business at home saves you rent and travel costs. You set your own hours and work around your life. Custom products are popular because people like things made just for them. You can sell online or to local customers without needing a big store.
The best part is you don’t need thousands of dollars to start. With smart choices, you can launch for under $1,000 in many cases. Focus on print-on-demand style methods where you only make items when someone orders. This way you avoid wasting money on unsold stock. Low-cost custom businesses often use simple printing techniques that let you create high-quality items quickly.
Many beginners earn extra income or even replace their full-time job this way. It all starts with picking the right low-cost method and learning the basics.
Choose a Simple and Affordable Custom Method
The first big decision is what to make and how to make it. For very low cost, look at methods that need little equipment.
One popular choice is DTF printing. You print designs on special film, add powder, dry it, and press it onto fabric with a heat press. It works on t-shirts, hoodies, bags, and more. The startup cost is lower than many other printing options, and you can start small.
Another option is sublimation for mugs, tumblers, and mouse pads. Or use vinyl cutting for simple designs. UV/DTF is also growing for hard items like phone cases.
If you want the lowest entry point, begin with DTF because the supplies are cheap and the process is straightforward. You only need a printer, heat press, and basic materials. Many people start with a used or entry-level setup to keep costs down.
Take time to watch free videos online. Practice on a few items before selling. This helps you avoid early mistakes that waste money.
For a clear guide on the process, you can view more about making transfers at home.
Set a Realistic Budget and What You Need
Keep your starting budget tight. Aim for $500 to $1,500 total. Here’s a simple breakdown:
- Printer or basic DTF setup: $300–$800 (look for beginner models)
- Heat press: $150–$300 (small size is enough at first)
- Blank garments or products: $100 for the first batch
- Inks, film, and powder: $100–$200
- Packaging and labels: $50
Skip fancy extras in the beginning. Use your existing computer and phone for designs and photos. Shop around for the best prices on blanks from wholesalers. Buy only what you need for the first 20–30 orders.
Track every dollar you spend. A simple notebook or free phone app works fine. This habit helps you stay profitable from day one.
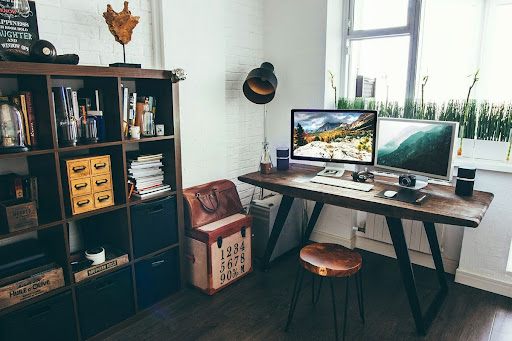
Create Your Workspace at Home
You don’t need a big room. A corner of your bedroom, garage, or kitchen table can work. Focus on these basics:
- A flat, stable surface for your equipment
- Good lighting so you see details clearly
- Power outlets and a quiet fan for ventilation
- Storage shelves for blanks and supplies
Keep the area clean and organized. Dust and mess can ruin prints. Set up a small “production zone” and a “packing zone” so your workflow stays smooth. Many people start with less than 50 square feet and do fine.
Make sure the space is safe – keep kids and pets away from hot equipment and inks. A simple curtain or room divider can separate your work area when needed.
Learn the Skills You Need
You don’t have to be an artist or tech expert. Start with free tools like Canva for designs. Watch YouTube tutorials for your chosen method. Most processes have just a few repeatable steps.
Practice every day for the first week. Make sample products until the quality looks good. Learn how to take nice photos with your phone – natural light works best. Write simple product descriptions that tell customers the benefits.
Join free online groups where other home business owners share tips. Ask questions and learn from their experiences. This community support costs nothing and saves you time.
Build Your Online Presence on a Budget
You need a place to sell. Start with free or low-cost platforms:
- Etsy or similar marketplaces (small listing fees)
- Free social media accounts on Instagram, Facebook, and TikTok
- A simple free website using tools like Carrd or Linktree
Take clear photos of your products. Show them being worn or used. Post regularly – even one photo a day helps. Share your story: “I make these custom shirts at my kitchen table!”
Use hashtags and join local buy/sell groups. Offer a small discount for the first customers to get reviews. Word-of-mouth spreads fast when people like your work.
Find Customers and Start Selling
Begin with people you already know. Tell friends and family about your new business. Offer them a special price for their first order.
Then expand online. Post in hobby groups, sports teams, or event pages. For example, make team shirts or event merch. Listen to what people ask for and create designs around those ideas.
Price your items to cover costs plus profit. Add $8–$15 markup on a basic t-shirt after materials and time. Test prices and adjust based on sales.
Ship orders quickly. Use cheap shipping options and simple packaging. Happy customers leave good reviews and come back for more.
Keep Costs Low Every Day
Success comes from watching expenses:
- Buy supplies in small batches at first
- Only print when you have an order
- Reuse packaging materials when possible
- Learn basic maintenance to avoid repair costs
Check for free local resources like library computers or community workshops. Negotiate better prices once you order more regularly.
Track your time too. At the start, you may spend hours on one order. As you get faster, your profit per item goes up.
Handle the Business Side Simply
You don’t need complicated paperwork at first. Use a free spreadsheet to record sales and expenses. Open a separate bank account when you start making regular money.
Check your local rules about home businesses. Some areas need a simple permit. Set aside a little money for taxes.
Create a basic return policy and be honest with customers. Good service builds trust and brings repeat orders.
Scale Up When You Are Ready
Once you have steady sales, you can grow without big spending. Add new products, improve your designs, or expand to more platforms. Some people later buy better equipment or rent a small studio.
Many home businesses stay small and provide nice extra income. Others grow into full-time jobs. Both paths are okay – choose what fits your life.
For reliable equipment and supplies that help keep costs low, check out dtflinko.com. They offer practical options for beginners working from home.
Common Challenges and How to Beat Them
You might face slow sales at first. Keep posting and improving your products. Mistakes with prints happen – treat them as learning opportunities.
Time management is important when you have a day job or family. Set fixed hours for your business each week.
Stay motivated by celebrating small wins like your first sale or a happy customer message.
Final Thoughts
Starting a low-cost custom business from home is totally doable. Pick one simple method, set up a small workspace, learn the skills, and start selling to real people. Keep your costs under control and focus on quality and customer service.
Thousands of people now earn money this way. You can be one of them. Take the first step today – choose your method, order basic supplies, and make your first sample product.