In the ever-evolving world of Web3 and decentralized applications, seamless network integration is no longer a luxury — it’s a necessity. Enter the dynamic duo of MetaMask and Chainlist, which we refer to here as “Techedubyte”—a term highlighting the delivery of technical concepts in easy-to-understand, bite-sized pieces. Together, they make adding EVM-compatible blockchains a breeze, enabling users and developers alike to connect to new networks with minimal hassle. In this article, we’ll walk you through what Chainlist is, how MetaMask leverages it, and how you can use this pairing to streamline your Web3 presence.
Before we dive deeper, let’s first clarify the role of Chainlist in this integration.
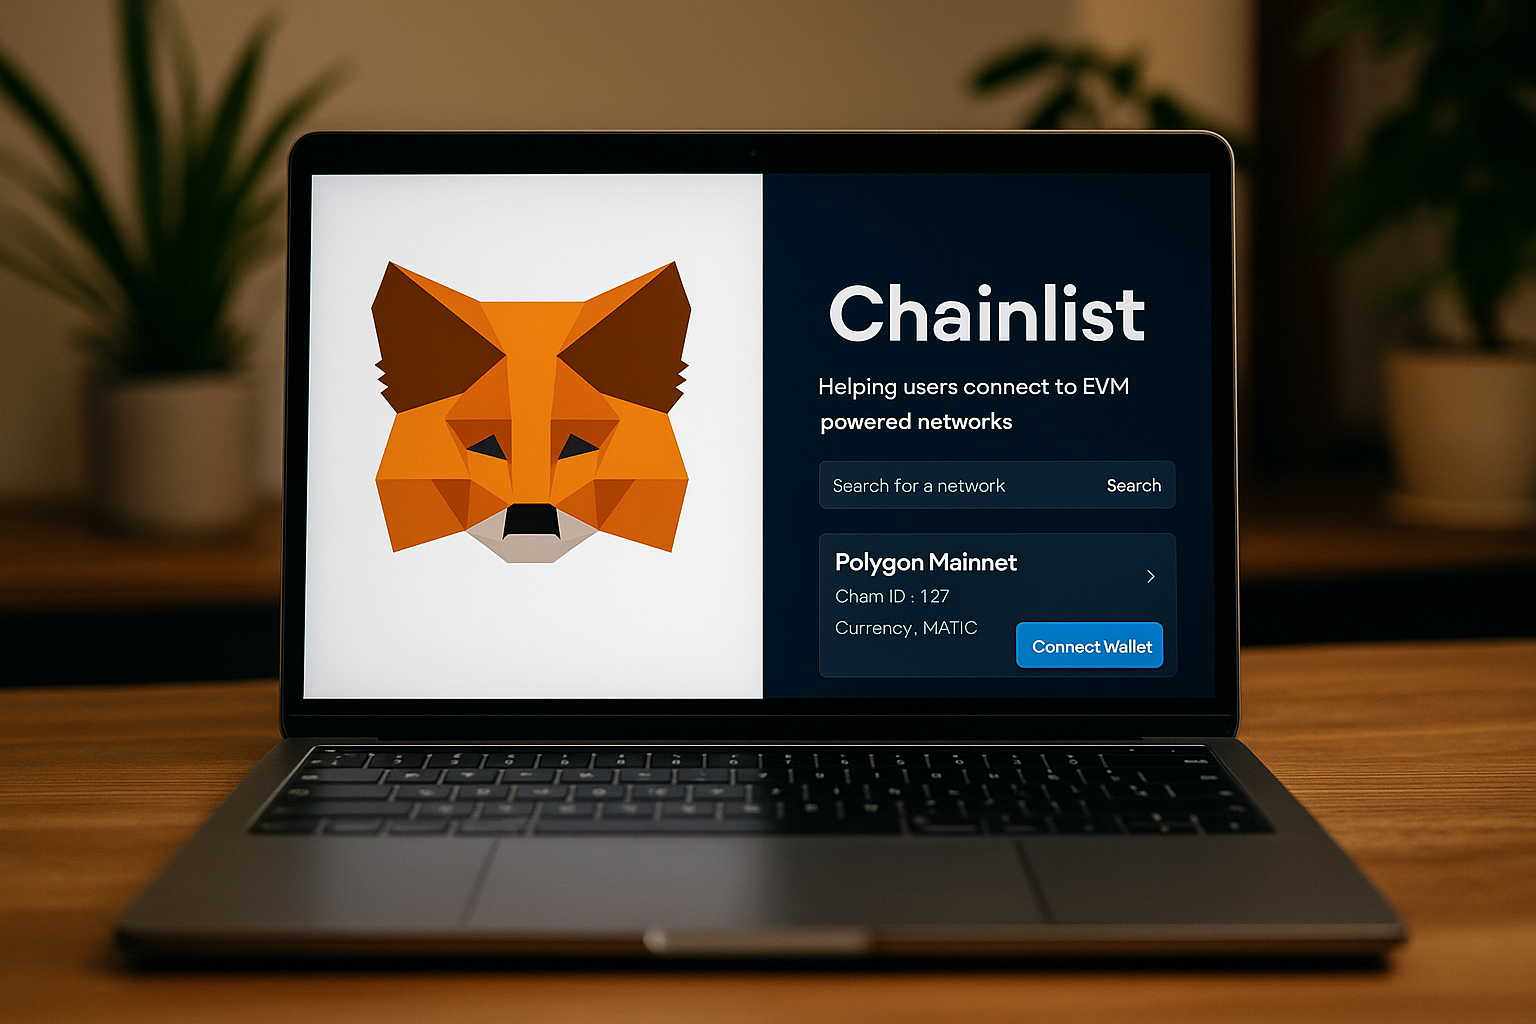
Chainlist is a community-driven directory of EVM-compatible networks — that is, blockchains built to run Ethereum-style smart contracts. On Chainlist, you’ll find the RPC URLs, chain IDs, currency symbols, and other relevant network parameters you need to connect your wallet or dApp middleware. The beauty of Chainlist is that it collects many networks in one place, making it easier to browse and add them.
Why MetaMask needs chain directories like Chainlist
MetaMask, the widely used Web3 wallet, supports a variety of networks by default (most commonly the Ethereum mainnet). But with dozens of sidechains, layer-2s, and specialized networks emerging, the wallet needs a way to easily adopt new environments. MetaMask allows users to add custom networks manually or by integrating with directories like Chainlist. Having a trusted directory simplifies the process for users — you don’t need to hunt for the exact parameters; you can rely on a single interface to access new chains.
The process: How to add a network via Chainlist in MetaMask
To add a new network to MetaMask using Chainlist: Go to the Chainlist website, connect your wallet, and search for your desired network.
- Find the network you need using the search bar (testnet, layer-2, or alternative EVM chain).
- Click on “Add to MetaMask,” and MetaMask will prompt you to approve the network addition. Afterwards, the network will be available in your network list.
- Switch to the new network immediately, or stay on your current network—either option is available.
The result: within a few clicks, you’ve extended your MetaMask wallet to support a new chain, enabling dApps, tokens, or services on that network to be accessed.
What “Techedubyte” means in this context
In this article, “Techedubyte” represents technical insights in bite-sized form — focusing on the technology behind the feature rather than surface-level marketing. When we say “Chainlist MetaMask Techedubyte”, we mean breaking down the technical integration between Chainlist and MetaMask so you can understand precisely how network integration works and why it matters.
Benefits of using Chainlist + MetaMask for Web3 connectivity
- Speed and simplicity: Rather than manually entering line-by-line network details (RPC URL, Chain ID, symbol, etc.), Chainlist presents them in one place. This accelerates network adoption.
- Broader ecosystem access: With many networks pre-listed on Chainlist (mainnets, testnets, sidechains), users can experiment, develop, or deploy across chains smoothly.
- Reduced error risk: Manually adding networks increases risk of errors (wrong parameters, invalid RPCs, etc.). Using a directory helps mitigate this, though users still must verify. MetaMask itself warns users about custom networks and encourages verification.
- Developer-friendly: For Web3 developers building multi-chain dApps, the combination offers a reliable way to instruct users on how to “connect” their wallet to a specific network — you just provide the Chainlist link or network name.
Security considerations and best practices
Even though Chainlist simplifies the process, you cannot skip due diligence. MetaMask explicitly notes that it does not verify the networks you add — it’s your responsibility. Key best practices:
- Cross-check the network’s parameters (RPC URL, Chain ID, symbol) against an official source.
- Ensure the network is listed in trusted directories such as Chainlist or chainid.network. If not, proceed with caution.
- Understand that each network means its own token ecosystem and risk model; cheaper fees don’t always mean the same security as the Ethereum mainnet.
- Always ensure you have the native token of the network for gas/fees before interacting with apps.
Use cases: When and why you’d add a network
- Decentralized finance (DeFi) and DEX access: If a dApp is deployed on a specialized chain (e.g., a layer-2), you’ll need that chain in your wallet to swap or stake.
- NFTs and gaming on alternative chains: Many games mint on less congested, lower-fee chains — adding that chain lets you view your assets and interact.
- Testnets for development: Developers can deploy contracts on testnets without risking real funds; Chainlist often lists test networks.
- Cross-chain or multi-chain wallets: If you’re managing assets across multiple networks, having many chains added to your MetaMask simplifies switching and tracking.
Potential pitfalls and things to watch out for
- Adding a network does not mean funds from one chain automatically transfer to another chain — wallets share an address, but assets are chain-specific. MetaMask explains that, by default, you cannot send tokens from one chain to another without using a bridge.
- If you add a malicious or spoofed network (with wrong RPC or chain ID pointing to a scam), you risk asset exposure or incorrect interactions. Always verify.
- Just because a network is listed on Chainlist doesn’t guarantee full decentralization or security parity with mainnet — you should still evaluate known risks and project credibility.
- Switching networks may confuse users if dApps auto-detect network and prompt “Switch to X network” messages — make sure users understand which network they are operating on.
Summary: Bringing it all together
In short, the pairing of Chainlist and MetaMask — our “Techedubyte” viewpoint — is a powerful enabler of seamless Web3 connectivity. By using Chainlist as a verified directory of EVM networks, and MetaMask as the wallet gateway, you can add, switch, and operate across multiple chains with minimal friction. For users, this means more flexibility; for developers, broader reach; and for communities, easier onboarding. That said, the “easy” path does not remove the need for vigilance: always verify network details, understand the chain’s token model, and proceed carefully. When done right, however, you unlock a multichain Web3 world — no longer tethered to one blockchain.